- HubPages»
- Technology»
- Computers & Software»
- Computer How-Tos & Tutorials
Build Your Own PC Computer

Can you build your own computer?
I think many people are discouraged from building their own computer because they regard the innards of a computer as extremely complex. Naturally, therefore, these things should be left to people with proper training.
It seems to me that the PC computer has been designed to be built by someone with enough knowledge and commonsense to know what they can do and cannot do, and who knows where to draw the line. A lot of training in computer assembly is not really needed.
In my experience it is more about patience and attention to detail than technical knowledge. For instance, a newbie in building a PC computer should be prepared to read a manual several times, and take at least three hours to assemble your computer, where half an hour might do.
Above all, quite simply make sure you stay on the straight and narrow of doing the job right, with no short cuts, and ensure you take every precaution you can.
Beware of disasters
When handling computer components you should never forget that they are delicate and can be damaged easily. You might find that one of your computer components no longer works regardless of repeated testing. As you will know very little about them, and will not have access to proper testing equipment, your only conclusion can be that you simply were not careful enough with them. Be more careful in future or else abandon your dreams of building your own computer.
You should also consider what might be the financial implications for you if one or more of your components is terminally damaged, and your options are probably either to:
- replace that component, at further expense.
- or abandon the entire project, and write off your entire expenditure.
Now might be a good time to ask yourself, "Should I go ahead with this project?"
Building up your knowledge and making choices
For a complete novice in building a computer, I would say the stages are:
1. buy a so-called ‘idiot’s guide’ to building and upgrading a PC computer. Maybe I should define the sort of book I mean as one that explains how to build the computer, but doesn’t go into a lot of detail about theory. The author talks you through all the dos and don’ts, such as don’t lose any of the screws and don’t spill water on the components, as well taking precautions against damage to components from static electricity.
2. do talk to people who have built their own computer; and get advice on topics that bother you. I once asked a computer engineer I used about anti-static wristbands as I had read they were essential. He replied “go and grab the radiator”, as this would discharge any static electricity from me. A method I had been using was to plug the computer case, with a mains computer cable and 3-pin plug in to a mains electrical socket, but leave the electricity switched off. This will provide electrical earthing for the case contents, so you can then gently grip the case at any time to discharge static, while there will no risk of electric shocks. So much for technical requirements.
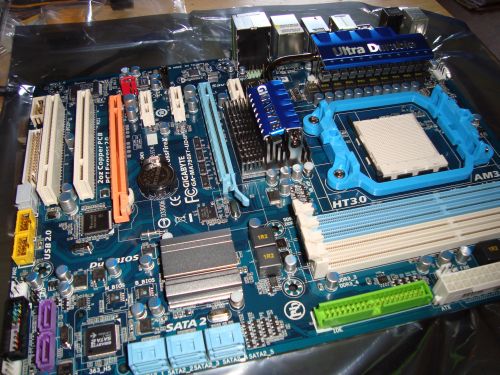
3. do read your ‘idiot’s guide’ before you make any decisions about the computer you want. This is important because there are a few choices to make that will restrict your choices from there onward, both in your choice of other components, and what you can add to your computer at a later date. The heart of the computer is the motherboard. This choice will dictate the range of CPU and memory modules you can use. An ATX type motherboard will generally have more features than an mATX motherboard, which is smaller and comparatively cut-down. An ATX specification motherboard will require a larger system case. The number of drive bays in the case, and the number of drive data cable connecters on the motherboard, will determine how many hard disks and CD/DVD drives you can fit. There is a further option of fitting a control board to provide more drive connectors, but this would require a slot on the motherboard. That in turn might restrict other options.
4. When you have enough knowledge to know what questions you need to ask, visit a local computer shop that sells components, and ask a few questions to start yourself off. A preliminary list of suitable components at this point would be useful, so you can get their comments. The responses you receive will also help you assess the store as a suitable supplier.
5. You might want to keep notes as you build up your knowledge.
When you have bought your computer components
In your idiot's guide you should find a step-by-step guide to assembling the computer. Read through it, comparing each component mentioned against those you have bought. This will help prepare you for the assembly procedure. When you are carefully fitting the parts together, especially for the first time, you will want to have as few surprises as possible.
Time to build your computer
You will be dealing with basically nine or ten components – the system case, the motherboard, the CPU or central processing unit, the CPU cooler, the memory or RAM modules, the hard drive, the DVD / CD drive and possibly a floppy drive. I have counted the RAM modules as a single component, although there might be several of them. The components are very largely idiot-proof; your major task is to bear in mind just how very little you know, and so should be very careful.
The grand sum of your involvement with each of these will be take appropriate precautions, make appropriate checks, and to connect it appropriately with the other components being installed. There will be some more work involving the motherboard and system case.
Installing the motherboard
- When you settle down to build it, first of all ensure you have the entire room to yourself, and will have no interruptions or distractions. Disconnect the phone, and turn the television and radio off. Clear your work surface of anything not immediately required for your computer assembly process and have your idiot’s guide handy. In my experience the only tools you should need will be various sizes of screwdriver of slot-edge and Philips or star head type. Of course, any specialist computer maintenance tools you might have could also prove useful. Additional items that could possibly be useful are a magnifying-glass and a pair of tweezers. The first is because you might otherwise need to squint a bit at some of the components to make sure you do things right, and the second is for tasks in places where your fingers might not reach without possibly causing damage.
- consider what can go wrong, and how much your components have cost you. Computer components are delicate; and the RAM modules and the CPU can possibly be damaged by static electricity if, for example, your fingers touch its pins or connectors, Therefore, be careful not to touch those parts. Examine each component in turn, and place it carefully back in its packaging. In my experience you will receive most or all these components packed in anti-static bags, and most likely boxed.
- read the component manuals you receive – the motherboard especially should be provided with its own manual, providing detailed instructions on installing it into the system case.
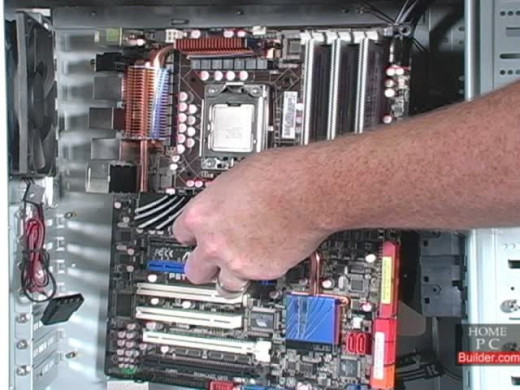
All you have to is to fit the CPU and CPU cooler, and memory modules to the motherboard. Every step of this should be done with patience. There is little to do and each step is fairly simple – all you have to do is to ensure you do everything right. An example of an error that can prove expensive is to fit the CPU cooler to the CPU without applying any thermal compound. This error will likely burn out the CPU – it would then be useless, costing you at least £30, or US$50 to replace. - Fit the motherboard into the case, using the screws supplied and connect it to the power supply unit in the case. There are generally half a dozen wires that you need to connect from the system case to the motherboard. You will find instructions in the motherboard manual. Sometimes the names for some wires might differ between the manual and labels on the connectors, as the case and motherboard are from different manufacturers. Even so, in most cases it is simply a matter of trial and error.
- Assuming you have reached this far then fit your hard disk drive and CD/DVD drive and screw the side cover onto the case. Install the computer case and monitor at your desk. Fit the mains cable supplied from the case to the mains electricity supply – there should be a power fuse fitted to each computer mains cable, though it always pays to check. Connect the monitor, keyboard and mouse to the computer case.
finally, check whether you have missed anything out or done anything wrong. This could be your last chance to check.
Success, back to square one or disaster?
Now is your moment of truth. Put an operating-system CD or DVD into the CD/DVD drive, and press the on/off switch on your very own ‘I made it’ computer. Ensure the monitor is switched on also. You might hear a faint hum and see one or two flashing lights.
You should see a system message of some kind on the screen. Depending on the message you see - success, or investigate the fault.
© 2012 Peter Ray